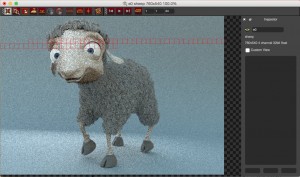
 Pixar has made their RenderMan product free for non-commercial use! Huzzah! This is great news for anyone who likes to mess around with shaders and shapes.
If you’re not using Maya or Kantana, then you need to run RenderMan from the command line. Which is fine, but I found that there were a few hoops I had to jump through to get it turn on my Mac running OS X 10 (Yosemite). Here’s what I did.
Before we start, I’ll just say that I don’t promise that this is the best solution, or even a good one! It’s the one that’s working for me, so I’m sharing.
- Start the install of RenderMan by starting here. Note: You must have an account on the RenderMan support forum to install the software, and you must be logged in while installing. It’s free and the forums are great, so go ahead and do that.
- If, like me, you don’t have Maya, you will still want to install the Maya support software. That’s because you want the image previewer that is part of that support package (weirdly, that previewer is named it). So when the installer tells you it can’t find Maya, dismiss the dialog, click the “Show All” button, and then click both the RenderMan file and the latest version of the Maya support stuff.
- You need to edit your .bashrc file (located in your home directory) to accommodate RenderMan, and to let it find the it program. The first part comes from the great advice at Using RenderMan Without Maya, and I’ll repeat it here:
export RMANTREE=/Applications/Pixar/RenderManProServer-19.0
export PATH=$RMANTREE/bin:$PATH
But wait, that’s not all! You need one more line, and this is the weird one. You need to tell RenderMan how to find the it previewer. It’s kind of blunt, but I just add the executable right into my path. So this line also goes into that .bashrc file:
export PATH=/Applications/Pixar/RenderManStudio-19.0-maya2015/bin/it.app/Contents/MacOS:$PATH
- Almost done! Now when you run RenderMan, you need to tell it to use the it previewer. You can do that inside your rib file, or you can do it on the command line, which will override whatever the rib says to do. Here’s the command-line version:
prman -d it myPicture.rib
The it previewer is nice because it shows you the image as it builds. And from there, you can save the result in normal formats like tiff.
Note that you can find other installation guides on the web that will advise you to install the X11 (or Xquartz) window system. I prefer this approach because I think it’s cleaner, and I like the it previewer.

Thank you sooo much!!